Showing posts with label Halloween. Show all posts

Tuesday, October 28, 2014

DIY Black Heart Nail Art Tutorial

You asked for it! While my Instagram feed is teeming with images of lingerie, costumes and general inspiration, my nails get more comments than I ever would have imagined. Since I started my residency at FiSF, I've been working more than ever and dolling up has taken a pretty big backseat to just about everything else. My twice-monthly manicures are no more, but that doesn't mean I can't carve out a half hour a week to take care of them on my own. When Bike Pretty blogger Melissa found out that I did my now-signature heart manicure myself, she insisted that she document the process in photographs, and who am I to decline an offer like that?

Before we get started, a few notes: (1) The heart shape will unequivocally NOT work if your polish isn't very wet (read: brand new). The only polish I've found that holds its drip factor (crucial for this mani) is Chanel polish. I bought mine over 6 months ago and it still does the trick. I've found that cheaper brands just aren't up to the task and you'll be tearing your hair out trying to get a pretty shape from a gummy polish. (2) Lay off the caffeine. I can't stress this enough. Don't drink any caffeine before doing this manicure. A crucial component of a successful heart mani is a steady hand. My hands always start to shiver a bit after a cup or two of coffee and then the task becomes impossible.

What you'll need:


File any rough edges and establish your nail shape if you haven't already. The talon shape is really in style right now, so I tend to go in that direction - that said, this length doesn't typically last long before chipping, so shorter is just fine too.


Apply the base color polish - while I use Ciaté's Members Only polish, I think just about any sheer neutral will work and will be especially lovely if close to your skin tone. One layer should do it. Wait a few minutes for this layer to dry before moving on.


Here's where steady hands will make or break your mani. The heart shape is created by doing two sweeps of the polish, relying on the drop from a semi-wet brush to do the work. I reiterate: this will not work with a dry brush - drippy is good, as that will help create the soft, round shape of each half of the heart. You may need to play with this technique a few times to get it right - it certainly took me a while!


Once you've done the first pass, use that as a guide for the second. I usually start the heart about 1/3 of my nail length up from the cuticle. You'll want to do the second pass as quickly as possible so the polish from the first pass doesn't get gummy as you sweep into it.


Now the hard part: your non-dominant hand. Painting my right hand is always the hardest part. Be deliberate with your sweeps and you should get through it with minimal issues. Once you've allowed the first coat of heart polish to dry (about 10 minutes or so), go ahead and paint the second coat. This is where you can correct any errors in shape, all while gaining a deeper color. Once the second coat is done, sit on it for awhile, at least another 10 minutes.


Apply your topcoat. Many times I've found that I haven't waited long enough when I see my heart color dragging all over the place as I paint the top coat - so make sure everything is dry before moving on. I love Out the Door because it really does dry quickly. Remember, you're working with three layers of polish here (not including the topcoat), so a quick drying coat is key, as is a patient mind set. Once you're done, wait until everything is absolutely dry before doing anything else. One premature flick of the hair could spell disaster, so sit tight for a while.


And there you have it: the heart manicure! Melissa said she was shocked at how quickly it all came together, and she's right: it IS a quick mani. The bulk of the time I spend on my nails is waiting for them to dry. All in all, there's probably five minutes of painting time at most. I usually get at least a week out of this mani, and sometimes two if I'm lucky.

Now that you know the secret, which color will you do YOUR heart mani in?

Thursday, September 6, 2012

Robe de Style Recap

If you've been following my exploits on Twitter, you know that I created a robe de style dress for a party my husband and I threw to celebrate our anniversary. We rented The Russell Room, a small cigar lounge inside Bourbon & Branch (a fantastic cocktail bar in San Francisco that was once a speakeasy). We asked our guests to dress in the style of the 1920's to keep with the overall feeling of the location - and that meant I had to find the perfect outfit.

The Russell Room inside Bourbon & Branch

Though I love the fashion of the 1920's, most of the dresses were not flattering on women with busts and hips. The trend back then was to bind an ample bosom down to boyish proportions while wearing a girdle-like corset contraption to tame wide hips. Lucky for me, the robe de style dress was a perfect choice given my shape. It was first created by Jeanne Lanvin, and coveted by women who didn't want to wear the uber-short dresses that were then fashionable. Whether or not it's truly the case, I like to think of the robe de style as evidence of a prolonged affection for all things Edwardian. It's a more streamlined and comfortable version of the frou frou gown of the teens, yet retains all the trappings of the prior decade's girliness: ruffles, faux flowers, bows.

I just had to find a pattern that would work... and sadly, there were not many options online. Then I found this lovely creature on eBay. Not quite the right size, damaged and too pricey, but luckily the seller took a million pictures and the body looked easy to mimic.

The finished product

I had a wonderful time working on this project. I got to play around with from-scratch pattern drafting, an unholy amount of gathering, and a rustling Thai silk that smelled like heaven and still makes me swoon when I see it.

Faux flowers, pleats galore and a silk organza hem

For the flower flourish up front, I visited The Ribbonerie. The owner, Pauline, helped me find the perfect spray of vintage German blossoms. I was hoping to get something similar to the original, but had to keep reminding myself that the color and limpness of the 1920's version was due to patina and was unlikely to be replicated. The flowers I picked were as close to perfect as I was going to come with only a week to go.

Dress back and pleating close-up

Even though the misplaced darts on the original dress suggest it was photographed backwards, I couldn't resist keeping the flowers up front, and I loved the idea of the back pleating mimicking the shape of a derrière.

The bodice was a cinch to make - two pieces with four long sashes that tie at the natural waist and cinch above each hip. The skirt was cut double wide, copiously pleated, then sewn into the front and back torso panels before stitching them together. I also finished the hem in a papery silk organza, just like the original. Unlike the original, though, I bias bound the neckline and created wider straps so I'd be able to wear a regular bra underneath.

Jewelry from Etsy, Haute Bride and vintage stores around San Francisco,
1930's evening shoes from Torso Vintages

And if I was going to pull this whole thing off, I had to accessorize like a flapper too: with a bucket of bling. I pulled every sparkly thing I had in my possession, including the necklace I wore for my wedding. What I didn't already have, I snagged off Etsy. Shoes proved to be more difficult to find, but I lucked out and found a pair in need of repainting. They turned out to be wickedly uncomfortable and I kicked them off an hour into the party (see below). I faux-bobbed my hair and gave myself a half-moon manicure. All set!

In action

I love this entry on the flapper from Wikipedia:
Flappers were a "new breed" of young Western women in the 1920s who wore short skirts, bobbed their hair, listened to jazz, and flaunted their disdain for what was then considered acceptable behavior. Flappers were seen as brash for wearing excessive makeup, drinking, treating sex in a casual manner, smoking, driving automobiles and otherwise flouting social and sexual norms.
True to Flapper style, I was so preoccupied with doing my own version of the Charleston and drinking Revolvers that I never settled down for some refined photographs, but so be it. There's always Halloween!

Monday, October 31, 2011

Halloween on the Santa Cruz Beach Boardwalk

My husband's little sister is visiting from the East Coast, which, as most of you have probably heard, was pummeled with unseasonably wintry weather this weekend. In an effort to give my sis-in-law one more wink of summer before she heads back home, we drove down to Santa Cruz today.

All three of us grew up spending time down the Jersey Shore in Ocean City, NJ which is known for its carnival-like boardwalk. I've always envisioned the Ocean City boardwalk as a real-life incarnation of Pinocchio's Pleasure Island. The boardwalk boasts dangerously rickety old rides, a rainbow of blinding lights, and an army of staggering drunk folks.

Santa Cruz also has a boardwalk, which attempts to mimic the classic Coney Island/Atlantic City experience. It's not nearly as expansive, but still seems all-too-saccharine. In other words, it's just right.

When we arrived, however, we realized that every ride, attraction and booth was closed. October is considered off-season so it's open during weekends only. Instead of filling up on cotton candy and fried Oreos and riding the Double Shot, we wandered the The Beach Boardwalk's vacant lacquered wasteland and I snapped a few creepy pics. Happy Halloween everyone!


How did you spend your Halloween?

Friday, October 28, 2011

Marie Antoinette: Shoes On A Budget

Just in time for Halloween... this is cross-posted from my Tumblr. Enjoy!

Loved the shoes in Marie Antoinette?  Dear God, so did I.


I’m a freak for historical costume.  When I think of what I could be wearing were it, say, 1750, 1860, or 1949, I get a little upset.  People tell me “You can just wear costumes all the time…  after all, you do live in San Francisco!”  True, but I’m also a (mostly) sane individual who would like to retain her dignity and circle of friends, thank you very much.  So instead of wearing corsets, hoops and seamed stockings all year round, I reserve those outfits for special occasions.

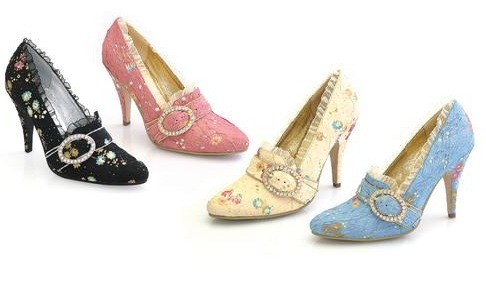
After all the Marie Antoinette hubbub caused by the eponymous 2006 film, I decided that, sooner or later, I must dress as Marie Antoinette for Halloween.  That time finally came last year when I wasn’t working more than a few hours a week and was jonesing for a project.  While I had no trouble making a corset, petticoat, shift and pocket hoops from scratch, shoes were another issue entirely.  Nowhere (I mean nowhere) had decent Rococo shoes.  I kept coming across travesties like these…


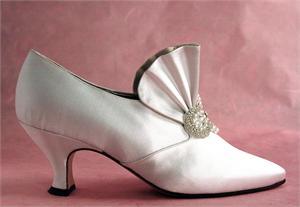
and prohibitively expensive beauties like these (from Peter Fox)…


…but could find nothing that bridged the gap of eh/cheap to OMG/expensive.  I wasn’t asking for much, just a court-heeled mule with a semi-pointed toe.  I could do the rest.  But it just wasn’t happening.  I spent an unreasonable amount of time online looking for shoes I’d only wear once or twice.  What the hell was my problem?  And THEN… I found them.  For less than $25 on Overstock!


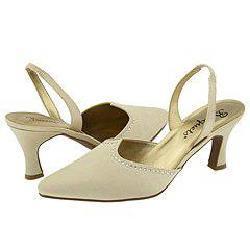
They had a close-to-perfect heel, and were already embellished with rhinestones.  My only complaint was the presence of an ankle strap, but that would be a cinch to cut off.  There was also the issue that the satin in the shoes was synthetic and therefore might not take dye as I had hoped.  But no pain, no gain, right?  At worst, the dye would remain on the surface, but run off the shoes if they got wet.  Whatever.  I wasn’t going to Wildwater Kingdom, I was having a Halloween party!  Time to take one for the team!

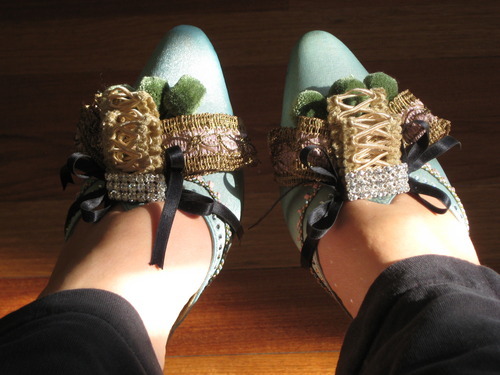
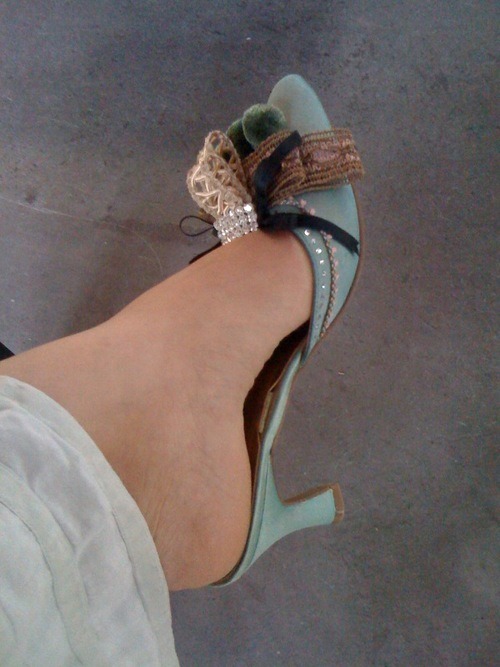
So, armed to the teeth with a bottle of teal Rit dye, a sponge brush, a glue gun, sharp scissors, $10 of random vintage ribbons and trims from The Ribbonerie and a roll of masking tape, I transformed the above budget bridal shoes into these:


Cool, huh?  And here’s a side view.


Peter Fox’s shoes are definitely more accurate, but accuracy wasn’t necessarily the goal here, and hell, I loved making them!